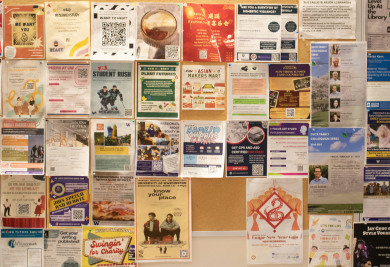


When planning a large format printing, whether it’s a poster, banner or backdrop printing– one of the most common questions is: What DPI should I use?
Another important consideration is the design size. From a business owner perspective, it’s not always easy to know how to design in the appropriate size. Viewing an image from a computer screen may not translate well when blown up into a banner or backdrop.
How to maintain the quality and clarity of your image in the printed design depends on print resolution. This is especially important when enlarging images for large format printing– as the larger the image, the more obvious the flaws.
What are DPI & PPI and What Do They Mean?
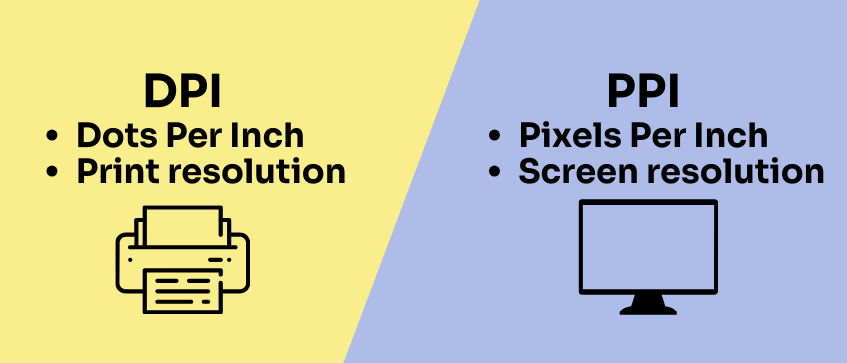
DPI and PPI are units used to measure image resolution in digital and print media.
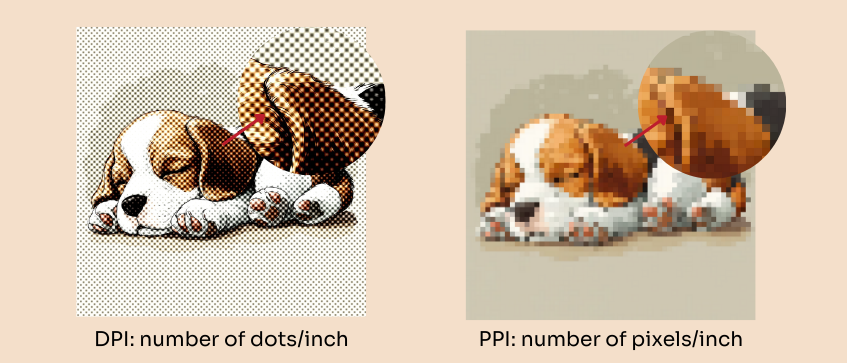
DPI (Dots Per Inch) specifically refers to the number of ink dots a printer produces per inch when printing an image. It is used for printer resolution, to indicate the clarity and detail of an image on a physical medium, like paper, banners, fabrics etc. The higher the DPI, the more ink dots are printed per inch and the more detailed the image.
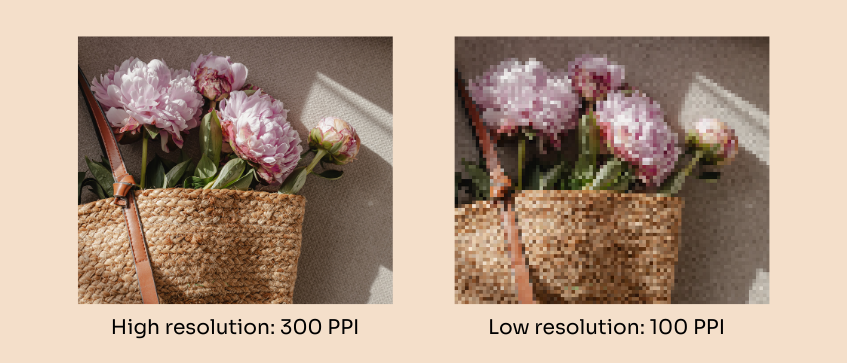
PPI (Pixels Per Inch) refers to the number of pixels per inch on a digital screen. A higher PPI packs more individual pixels within an area, creating a sharper image on the screen. The industry standard for printing is 300 PPI to ensure crisp and high-quality prints. Since the human eye cannot distinguish between 300 PPI and a higher resolution so it’s not quite necessary to design beyond 300 PPI.
Do You Really Need 300 PPI for Large Format Printing?
On smaller prints like name cards, flyers and brochures, it’s recommended to use 300 PPI images since we view these items at close distance and the human eye can notice imperfections at lower resolutions.
For large format printing however, you don’t always need 300 PPI. Generally speaking, it’s fine to use 100 DPI but at Gogoprint, we recommend a minimum of 150 DPI. Unless you create these large images from scratch, you’re unable to guarantee the resolution of the images. When using web images, which are most usually 72-100 PPI, these images may not be suitable to be enlarged to large sizes, which will affect their clarity.
Minimum DPI Standards
Large format printing like backdrops and banners, are meant to be viewed from a distance to observe the entire image. So it’s entirely fine to have a lower resolution to avoid the issues with having a large file. However sometimes, your audience may need to step in closer at event booths and you’ll want the image resolution to be adequate enough not to appear too pixelated and unprofessional. That’s when 150 DPI will suffice.
For effective large format printing, both DPI and PPI need to be optimized. The digital image (PPI) must be high quality and the printer output (DPI) must be able to produce the same quality on the printed material. Hence if the PPI of the original image is of poor quality, even a high DPI setting will not be able to compensate and the printed image will still be poor quality.
Factors Influencing DPI in Large Format Printing
There are various factors affecting the DPI selection in large sized prints that directly impacts the visual quality and production efficiency.
Viewing Distance
Often unestimated, the viewing distance is arguably the most crucial factor in determining the DPI of your large format prints. The further the viewer, the lower the DPI can be without affecting the final perceived quality. For example, an event backdrop which is meant to attract attention from a distance of 10 feet or more, can be printed at DPI of 100. In contrast, graphics meant for closer viewing, like a window poster, involves a higher DPI to maintain sharp visuals and detail.
Display Location
Prints on moving vehicles (vinyl wraps on buses, cars etc) are usually seen both up close and from a distance. As passersby may come in close distance to inspect the details, a higher DPI of at least 200 is recommended to maintain sharp, crisp details. While motion blur may mask minor imperfections when the vehicle is moving, clarity is still crucial when people are viewing the images up close.
Material Type
The print medium also affects the required DPI. Different materials absorb and reflect ink in unique ways, affecting the print’s clarity and vibrancy. Canvas, vinyl and fabric have uneven textures that naturally soften fine details, hence lower DPI of 150 is usually sufficient. However, materials like glossy vinyl or coated papers show fine details clearly, making a higher DPI more favourable.
Environmental Exposure
Outdoor prints exposed to sunlight, rain or dust can lose clarity over time. So when preparing the images, it’s important to know where the prints will be placed. While DPI doesn’t directly affect fading, prints exposed to various conditions will require a higher DPI and specialized inks to ensure longevity and clarity over time. For temporary event backdrop indoors, 100-150 DPI will suffice but for long-term outdoor banners, at least 150-200 DPI will be safer.
Tips for Designers
Start with High Resolution Images
-
Always try to use high resolution original images when designing so when the final design needs to be enlarged, the resolution will still suffice.
-
Avoid using images pulled directly from websites or web searches as those are generally 72 PPI and unsuitable for enlargement
Match Resolution to Final Print Size
-
Don’t design a file based on the final size as it will be too large for print.
-
Instead, design at scale (eg. 10% of final size) to keep the file to a suitable size and keep resolution consistent with your printer’s recommended DPI.
Use Vector Graphics When Possible
-
Utilize vector logos, text and graphics especially for important details so they scale cleanly without losing sharpness.
Double Check Viewing Distance
-
Adjust your design DPI based on your audience viewing distance.
-
The closer your audience = The higher your DPI
Test Print If Possible
-
Large formats are usually designed in scale and are hard to view on screen so check with your printer if they offer test prints so you can review the final design before printing.
How to Check If Your Image Is Good Enough (Simple Test for Non-Designers)
Not everyone has the expertise or access to advanced design tools, but here’s a quick way to test your image before sending it to print.
1. Save or export your design in the final print size.
2. Open it in a PDF reader.
3. Zoom in to 300% magnification:
- If the image appears clear and sharp, it will translate well in print.
- If the image appears pixelated or blurry, the resolution is too low for print.
Tip: If your printer only requires 150 DPI for your backdrop printing, just zoom in to 150% to review if you’re happy with the image quality.
This simple check can save you from unexpected surprises when your large format is printed in full size. While this method is not meant to be accurate, it’s meant to help you view the image resolution you’re designing.
Choosing the right DPI for large formats doesn’t have to be complicated. The key is to understand how viewing distance, display location, material type, and environmental factors affect the final result. While 300 DPI is ideal for small prints viewed up close, large format like backdrops and banners suffice with 100-150 DPI– provided the designs are prepared correctly.
At the end of the day, the goal is to achieve large format printing that are clear, professional and impactful–without overloading your files or sacrificing quality. Gogoprint is always available to help you achieve the best results. If you have any questions about file setup or the design process, we are more than happy to assist for any design services and printing needs in Thailand.