Need help? Call us at 02-026-3147

prices starting from 227.36 THB

View Products

prices starting from 250 THB

View Products
Promotional Products & Giveaways!

Available with custom print in up to four colors.

View Products
  • corporate customers
  • help
  • about us
  • work with us
  • blog

How to reach us

02-026-3147

social media

Print n

Please follow our artwork preparation guidelines to ensure that your artwork file is set up correctly.

  • 1. Add 3 mm of bleed

    During the production of paper products, cutting imperfections are to be expected - cutting can be off by a couple of millimeters from the cutting line. To allow leeway for such imperfections, you should add 3 mm of bleed on all edges of your artwork. Make sure that all colors, background pictures, and elements extend to the edge of the bleed area, to avoid the appearance of while borders on certain edges after cutting. Learn more how to set up the bleed here.

  • 2. Keep your content within a 3 mm safety margin

    To ensure that no important elements (text, graphics, images) get cut off from your paper product, make sure to keep such elements at least 3 mm away from the edge of your finished product dimensions.Click here to know how to set up 3 mm safety margin.

  • 3. Keep an additional safety margin of 1.5 cm on the top

    Please keep an additional safety margin of at least 1.5 cm on the top of your n to allow enough room for the Wire-O binding.

  • 4. Use CMYK color mode

    Except for silkscreen and pad printing, files should be prepared in CMYK color mode. Keep in mind that if the setup is wrong, colors on the finished product may differ from the file you sent. Here is how to set your artwork to CMYK color mode in Adobe Illustrator.

  • 5. Use an image resolution of at least 300 DPI

    To avoid blurriness, use only images and graphics that have a resolution of 300 DPI or more. Before sending your files, make sure to embed your images into the file. Read more about how to check the resolution of your assets.

  • 6. Use the right values for gray elements

    When setting up grey elements, set K to a percentage between 0 and 100, and keep all other colors (C, M, and Y) equal to 0%.

  • 7. Use the right values for black elements

    When setting up black text, thin lines and small elements, use pure black, i.e. C = 0, M = 0, Y = 0, K = 100). Text, thin lines, and small elements in pure black color should be set to overprint to avoid white gaps around the text. For larger elements, use a composite form of black (we recommend C = 30, M = 0, Y = 0, K = 100).

  • 8. Use maximum 2 colors for lines that are finer than 2 pt

    If lines are 2 pt thick or less, use only 1 or 2 colors. 4 colors may be used for thicker lines.

  • 9. Convert all fonts to outlines, or embed them in your file

    To avoid issues with fonts when submitting your file(s), make sure to convert fonts to outlines, or to embed all fonts when saving to PDF.

  • 10. Save and upload your artwork files as PDF/X-1a

    The best format for submitting print-ready files is PDF, under the PDF/X-1a standard. Where possible, submit your files in PDF format. See why PDF/X-1a is the right format for printing.

  • 11. Check for overprint

    Make sure that no elements are set on overprint, unless you need them to be.

Our free templates provide you with all the information you need to correctly prepare your artwork files for printing. Simply download the template that matches your desired product configuration.

If you have any questions about the product and ordering process, please have a look at our Frequently Asked Questions (FAQ). If can't find your question in our FAQ section, you can reach our friendly customer support on 02-026-3147.

  • 1. What is the fastest delivery for n?

    The fastest delivery time for n is d. Please note that you have to submit your order before 01:00 PM. Late payment or upload of your artwork might further delay your order. If you select Digital Proof Print during the checkout process, the production will only begin after your approval.

  • 2. Which production techniques are used?

    We only use digital printing technique for this Business cards.

  • 3. How will my n be delivered?

    All of our products are delivered in a securely packed cardboard box.

  • 4. I can't find what I'm looking for. Can I request a quote?

    If you can't find what you need, please call our customer service team at 02-026-3147 to help you place an order. You can also request a quote from our customer service team for special product configurations that are not available on our website.

  • 5. Which papers can I choose?

    For your n you can choose between three different papers: 190g, 210g, and 250g art card glossy.

  • 6. How can I upload my files?

    You can either upload a single file which contains all pages, or upload separate files each containing one page. Your file(s) can be uploaded either before you checkout and pay, or after. Please note that uploading files late might result in a moved expected delivery date.

  • 7. Which formats can I upload?

    The best format for submitting print-ready files is PDF, under the PDF/X-1a standard. Learn how to save your artwork using PDF/X-1a standard in Adobe Illustrator. However you can also upload your file in JPEG, PNG, PSD, EPS, TIFF or AI format for an additional fee of THB 50.00. Our graphic designers will then convert your file into a print-ready PDF file.

1. Choose Your Options

    • * Width must be between inch and inch
    • * Height must be between inch and inch
    • * Your number of pages is not available.

Format

Print Front & Back Side

Front & Back

Print CMYK on two sides

Paper type

Number of Pages

Refinement

Bookbinding

Can't Find What You Are Looking For? Click here

Details about ordering Table Calendars

  • Please keep an additional safety margin of at least 1.5 cm on the top of your table calendars to allow enough room for the Wire-O binding.
  • Looking for design service do look:

    here!

Table Calendars

Upload Design

Change to other services
  • ProductTable Calendars
  • Format6 x 8 inch
  • ColorsFront & Back
  • Paper type260g Art Card Glossy
  • Number of Pages8 sheets
  • RefinementNone
  • BookbindingWire-O Binding (White)
  • Quantity
  • Delivery date

        Found a Lower Price?

        We'll issue a voucher for 120% of the difference ! Learn More

        Request Paper Sample

        Request our sample box for free ! Learn More

        Table Calendars Product Details

        Print Calendars Online

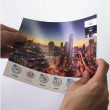
        Print Calendars with Gogoprint to:

        • Present your products/services in an original way
        • Give away at events or on special occasions
        • Be remembered by providing a useful everyday tool to your customers/prospects
        • 190g paper:

          190g paper is currently the only paper option for calendars with Gogoprint. The reason is that it strikes an optimal balance between sturdiness and usability on the one hand, and reasonable acquisition price on the other hand. Thanks to the high quality of the paper, your printed calendars will keep looking fresh all your round, and all at a low cost.

        • There Are No Types of Refinement Available for Calendars:

          Due to their nature, Gogoprint has decided to not offer any type of refinement when printing calendars. Calendars are used for reminders and for organizing one’s time. It is therefore crucial that anybody be able to write on a calendar. Since it becomes impossible to write on a laminated surface with normal pens, Gogoprint does not offer lamination on printed calendars.

        Why You Should Print Calendars for Your Business?

        Calendars are always welcome as corporate presents or give-aways, because they are extremely useful for anybody at all times. When printing calendars with your company's marketing message and corporate branding, they represent a great long-term advertising medium, since they basically allow you to market your brand to a person 365 days a year! This is invaluable, as it is nearly impossible that people don’t remember your brand after being exposed to it on a daily basis for so long. Just like other promotional material such as table standees, calendars are meant to be on display (be it on a wall or on a desk), and therefore serve as an advertising medium to reach not only the person who received the calendar, but also all the people surrounding that person on a regular basis. In addition, calendars are great presents that companies can also use to reinforce business partnerships, and solidify customer loyalty.

        For now, Gogoprint allows you to print calendars that are to be placed on desks, tables, displays, etc. These standing calendars can conveniently be placed anywhere, and therefore advertise your brand, products and services to anybody that sees them. In order to help you achieve these important goals, Gogoprint relies only on the highest quality printing equipment to allow you to print calendars in high quality while limiting cost. Each calendar that you print comes with high quality spiral binding (Wire-O Binding), which ensures that you can flip through the pages an infinity of times throughout the year without damaging your calendars. The calendars' stands are made of thick cardboard that ensures quality and sturdiness.

        When you print calendars, you can choose between 7, 8, 13, and 14 pages with Gogoprint, to allow you to print your calendars exactly the way you want to. This way, you can choose to print one or two months per side, and to include or not pictures or other information on the back side of you calendar’s pages. Basically, you can make your custom calendars look exactly like you were imagining them. Read more information about How to close artwork and more tips and tricks on our blog.

        In any case, printing calendars with Gogoprint will allow you to spread brand awareness while at the same time strengthening partnerships that you have with other businesses and/or increase your customers’ loyalty. As always with Gogoprint, delivery is completely free throughout Thailand, so the only thing for you to do after ordering and uploading your files is sit back and relax!

        Table Calendars Review & Rating

        
        2 reviews
        5.00 / 5 stars
        LINE Bear

        Not Sure How to Order? Add us on LINE

        Click here to add us on Line
        Scan our QR code to get started

        Our team will help you select the right product and get your order delivered in no time.

        You can also call us

        02-026-3147

        Guides and Tools

        Everything you need to know to get your Artwork ready

        Please follow our artwork preparation guidelines to ensure that your artwork file is set up correctly.

        • 1. Add 3 mm of bleed

          During the production of paper products, cutting imperfections are to be expected - cutting can be off by a couple of millimeters from the cutting line. To allow leeway for such imperfections, you should add 3 mm of bleed on all edges of your artwork. Make sure that all colors, background pictures, and elements extend to the edge of the bleed area, to avoid the appearance of while borders on certain edges after cutting. Learn more how to set up the bleed here.

        • 2. Keep your content within a 3 mm safety margin

          To ensure that no important elements (text, graphics, images) get cut off from your paper product, make sure to keep such elements at least 3 mm away from the edge of your finished product dimensions.Click here to know how to set up 3 mm safety margin.

        • 3. Keep an additional safety margin of 1.5 cm on the top

          Please keep an additional safety margin of at least 1.5 cm on the top of your n to allow enough room for the Wire-O binding.

        • 4. Use CMYK color mode

          Except for silkscreen and pad printing, files should be prepared in CMYK color mode. Keep in mind that if the setup is wrong, colors on the finished product may differ from the file you sent. Here is how to set your artwork to CMYK color mode in Adobe Illustrator.

        • 5. Use an image resolution of at least 300 DPI

          To avoid blurriness, use only images and graphics that have a resolution of 300 DPI or more. Before sending your files, make sure to embed your images into the file. Read more about how to check the resolution of your assets.

        • 6. Use the right values for gray elements

          When setting up grey elements, set K to a percentage between 0 and 100, and keep all other colors (C, M, and Y) equal to 0%.

        • 7. Use the right values for black elements

          When setting up black text, thin lines and small elements, use pure black, i.e. C = 0, M = 0, Y = 0, K = 100). Text, thin lines, and small elements in pure black color should be set to overprint to avoid white gaps around the text. For larger elements, use a composite form of black (we recommend C = 30, M = 0, Y = 0, K = 100).

        • 8. Use maximum 2 colors for lines that are finer than 2 pt

          If lines are 2 pt thick or less, use only 1 or 2 colors. 4 colors may be used for thicker lines.

        • 9. Convert all fonts to outlines, or embed them in your file

          To avoid issues with fonts when submitting your file(s), make sure to convert fonts to outlines, or to embed all fonts when saving to PDF.

        • 10. Save and upload your artwork files as PDF/X-1a

          The best format for submitting print-ready files is PDF, under the PDF/X-1a standard. Where possible, submit your files in PDF format. See why PDF/X-1a is the right format for printing.

        • 11. Check for overprint

          Make sure that no elements are set on overprint, unless you need them to be.

        Our free templates provide you with all the information you need to correctly prepare your artwork files for printing. Simply download the template that matches your desired product configuration.

        If you have any questions about the product and ordering process, please have a look at our Frequently Asked Questions (FAQ). If can't find your question in our FAQ section, you can reach our friendly customer support on 02-026-3147.

        • 1. What is the fastest delivery for n?

          The fastest delivery time for n is d. Please note that you have to submit your order before 01:00 PM. Late payment or upload of your artwork might further delay your order. If you select Digital Proof Print during the checkout process, the production will only begin after your approval.

        • 2. Which production techniques are used?

          We only use digital printing technique for this Business cards.

        • 3. How will my n be delivered?

          All of our products are delivered in a securely packed cardboard box.

        • 4. I can't find what I'm looking for. Can I request a quote?

          If you can't find what you need, please call our customer service team at 02-026-3147 to help you place an order. You can also request a quote from our customer service team for special product configurations that are not available on our website.

        • 5. Which papers can I choose?

          For your n you can choose between three different papers: 190g, 210g, and 250g art card glossy.

        • 6. How can I upload my files?

          You can either upload a single file which contains all pages, or upload separate files each containing one page. Your file(s) can be uploaded either before you checkout and pay, or after. Please note that uploading files late might result in a moved expected delivery date.

        • 7. Which formats can I upload?

          The best format for submitting print-ready files is PDF, under the PDF/X-1a standard. Learn how to save your artwork using PDF/X-1a standard in Adobe Illustrator. However you can also upload your file in JPEG, PNG, PSD, EPS, TIFF or AI format for an additional fee of THB 50.00. Our graphic designers will then convert your file into a print-ready PDF file.