Need help? Call us at 02-026-3147

prices starting from 227.36 THB

View Products

prices starting from 250 THB

View Products
Promotional Products & Giveaways!

Available with custom print in up to four colors.

View Products
  • corporate customers
  • help
  • about us
  • work with us
  • blog

How to reach us

02-026-3147

social media

Print n

Please follow our artwork preparation guidelines to ensure that your artwork file is set up correctly.

  • 1. Add 3 mm of bleed

    During the production of paper products, cutting imperfections are to be expected - cutting can be off by a couple of millimeters from the cutting line. To allow leeway for such imperfections, you should add 3 mm of bleed on all edges of your artwork. Make sure that all colors, background pictures, and elements extend to the edge of the bleed area, to avoid the appearance of while borders on certain edges after cutting. Learn more how to set up the bleed here.

  • 2. Keep your content within a 3 mm safety margin

    To ensure that no important elements (text, graphics, images) get cut off from your paper product, make sure to keep such elements at least 3 mm away from the edge of your finished product dimensions.Click here to know how to set up 3 mm safety margin.

  • 3. Use CMYK color mode

    Except for silkscreen and pad printing, files should be prepared in CMYK color mode. Keep in mind that if the setup is wrong, colors on the finished product may differ from the file you sent. Here is how to set your artwork to CMYK color mode in Adobe Illustrator.

  • 4. Use an image resolution of at least 300 DPI

    To avoid blurriness, use only images and graphics that have a resolution of 300 DPI or more. Before sending your files, make sure to embed your images into the file. Read more about how to check the resolution of your assets.

  • 5. Use the right values for gray elements

    When setting up grey elements, set K to a percentage between 0 and 100, and keep all other colors (C, M, and Y) equal to 0%.

  • 6. Use the right values for black elements

    When setting up black text, thin lines and small elements, use pure black, i.e. C = 0, M = 0, Y = 0, K = 100). Text, thin lines, and small elements in pure black color should be set to overprint to avoid white gaps around the text. For larger elements, use a composite form of black (we recommend C = 30, M = 0, Y = 0, K = 100).

  • 7. Use maximum 2 colors for lines that are finer than 2 pt

    If lines are 2 pt thick or less, use only 1 or 2 colors. 4 colors may be used for thicker lines.

  • 8. Convert all fonts to outlines, or embed them in your file

    To avoid issues with fonts when submitting your file(s), make sure to convert fonts to outlines, or to embed all fonts when saving to PDF.

  • 9. Save and upload your artwork files as PDF/X-1a

    The best format for submitting print-ready files is PDF, under the PDF/X-1a standard. Where possible, submit your files in PDF format. See why PDF/X-1a is the right format for printing.

  • 10. Check for overprint

    Make sure that no elements are set on overprint, unless you need them to be.

Our free templates provide you with all the information you need to correctly prepare your artwork files for printing. Simply download the template that matches your desired product configuration.

If you have any questions about the product and ordering process, please have a look at our Frequently Asked Questions (FAQ). If can't find your question in our FAQ section, you can reach our friendly customer support on 02-026-3147.

  • 1. What is the fastest delivery for n?

    The fastest delivery time for n is d. Please note that you have to submit your order before 01:00 PM. Late payment or upload of your artwork might further delay your order. If you select Digital Proof Print during the checkout process, the production will only begin after your approval.

  • 2. Which production techniques are used?

    We only use digital printing technique for this Business cards.

  • 3. How will my n be delivered?

    All of our products are delivered in a securely packed cardboard box.

  • 4. I can't find what I'm looking for. Can I request a quote?

    If you can't find what you need, please call our customer service team at 02-026-3147 to help you place an order. You can also request a quote from our customer service team for special product configurations that are not available on our website.

  • 5. How can I upload my files?

    If your artwork contains more than one page, you can either upload a single file which contains all pages, or upload separate files each containing one page. Your file(s) can be uploaded either before you checkout and pay, or after. Please note that uploading files late might result in a moved expected delivery date.

  • 6. Which formats can I upload?

    The best format for submitting print-ready files is PDF, under the PDF/X-1a standard. Learn how to save your artwork using PDF/X-1a standard in Adobe Illustrator. However you can also upload your file in JPEG, PNG, PSD, EPS, TIFF or AI format for an additional fee of THB 50.00. Our graphic designers will then convert your file into a print-ready PDF file.

1. Choose Your Options

    • * Width must be between cm and cm
    • * Height must be between cm and cm
    • * Your number of pages is not available.

Format

Print One Side

Front Only

Print CMYK on one side

Paper type

Refinement

Can't Find What You Are Looking For? Click here

Details about ordering Table Standees

  • Please note, that the website price is only valid for our standard template. If you have custom requirements, please contact our customer service for a quote.
  • Looking for design service do look:

    here!

Table Standees

Upload Design

Change to other services
  • ProductTable Standees
  • Format23 x 13 cm
  • Printing On Outside OnlyOutside Only
  • Printing On Outside OnlyFront Only
  • Paper type300g Art Card Glossy
  • RefinementNone
  • Quantity
  • Delivery date

        Found a Lower Price?

        We'll issue a voucher for 120% of the difference ! Learn More

        Request Paper Sample

        Request our sample box for free ! Learn More

        Table Standees Product Details

        Print Table Standees Online

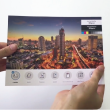
        Print Table Standees with Gogoprint to:

        • Announce promotions and special offers
        • Display important information throughout your store
        • Display your restaurant/bar/coffee shop’s food and/or drink menu
        • 300g paper:

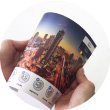
          Our 300g paper is the most sturdy and premium paper that we currently offer. It gives Table Standees a strong look and feel, and ensures that quality and durability are sufficient for long-time use. 300g paper makes for the strongest and most professional Table Standees.

        • 250g paper:

          250g paper is the perfect paper for whoever wants to strike a balance between having the strongest Table Standees, and the price of acquiring them. 250g paper ensures high quality and durable Standees, yet at a lower price than 300g paper.

        • Glossy Lamination:

          Lamination consists of a thin plastic film covering your product and protecting it against water, scuffs, and worn edges. Choosing Lamination adds elegance and quality to your Table Standees, emphasizing your own standards. Glossy Lamination reflects light, and will give colors more pop and vibrance.

        • Matte Lamination:

          Lamination consists of a thin plastic film covering your product and protecting it against water, scuffs, and worn edges. Choosing Lamination adds elegance and quality to your products, emphasizing your own standards. Matte Lamination almost completely eliminates glare (light reflection) issues, and gives your Table Standees a classy, smooth touch.

        • UV Coating:

          With UV Coating, your products are covered with chemicals and then treated with UV light to protect them and give a shiny look that accentuates colors. UV Coating adds a high quality touch that improves your Table Standees’ impact, and protects them from external influences.

        Why Should You Print Table Standees?

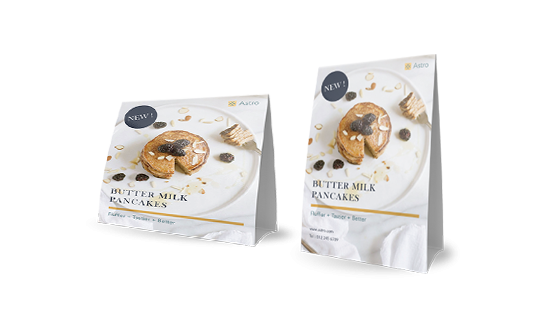
        Table standees are everywhere. You can see them in restaurants and bars, you can see them in stores, in museum, at the movies, etc. This is because printing Table Standees is an efficient and very visible way of displaying information. Typically, there are a couple of reasons that keep coming back for companies to print table standees.

        If you’ve ever been to a restaurant or bar, you’ll have noticed that table standees are a convenient way to display the food and/or drink menu of that place. The fact that they stand vertically is beneficial for a couple of reasons. First, it saves valuable space on the table, which is especially crucial if you run a popular place in a small space. The table standee menu can be slipped to the side whenever it is not needed,  and can be conveniently taken back to have another look at. Second, since these table standees eliminate the need for more traditional menus that occupy more room, and since they can be left on the table, it means that the menu is always visible for the customers. Customers and waiters won’t need to be bothered anymore to respectively ask for and bring the menus when they are needed. However, before printing table standees for your menu, you have to make sure that it fits your restaurant or bar’s image. If you are positioned as a very upscale and hip place, it might make more sense to print classy brochures for your menu.

        Menus only work for bars, restaurants, and the likes, but printing table standees is also a great way for any kind of business to display their promotions and special offers. For instance, even if you are a bar or restaurant that chooses to not display its menu with a table standee, you can still print table standees to communicate your daily/monthly deals and promotions. You can also use them to indicate when it is happy hour for instance (everybody loves happy hour!). Notwithstanding restaurants, any kind of business can print table standees to advertise its promotions. For instance, nearly all stores place printed table standees around the cash registers for people to read while they are waiting to pay and paying. Other stores place table standees around their products if there is a special promotion going on. Basically, you want to print table standees for your promotions and special offers no matter what your business is.


        Finally, and more generally, printing table standees is an efficient way to display any kind of information in your store or anywhere else. Table standees can be displayed next to products to provide more detailed information about them, they can be positioned by the entrance of your store to provide more background information on your store and how the project was born for example. You can also print table standees if you are attending a fair, exhibition or any other event. There are an infinity of other possible uses, like the one mentioned in this blog " How to close artwork yourself ". It is up to you to use your imagination and find a creative use for your printed table standees.

        Anyhow, they are a powerful marketing tool, and that’s why you need to print table standees. With Gogoprint, printing table standees is convenient and hassle-free. You can choose between a variety of papers and refinements to ensure that your table standees are the way you imagined them. Quality is ensured through the exclusive use of state-of-the-art printing equipment. Once your products are ordered, sit back and relax. Gogoprint offers free delivery all across Thailand.


        Table Standees Review & Rating

        
        1 reviews
        5.00 / 5 stars
        LINE Bear

        Not Sure How to Order? Add us on LINE

        Click here to add us on Line
        Scan our QR code to get started

        Our team will help you select the right product and get your order delivered in no time.

        You can also call us

        02-026-3147

        Guides and Tools

        Everything you need to know to get your Artwork ready

        Please follow our artwork preparation guidelines to ensure that your artwork file is set up correctly.

        • 1. Add 3 mm of bleed

          During the production of paper products, cutting imperfections are to be expected - cutting can be off by a couple of millimeters from the cutting line. To allow leeway for such imperfections, you should add 3 mm of bleed on all edges of your artwork. Make sure that all colors, background pictures, and elements extend to the edge of the bleed area, to avoid the appearance of while borders on certain edges after cutting. Learn more how to set up the bleed here.

        • 2. Keep your content within a 3 mm safety margin

          To ensure that no important elements (text, graphics, images) get cut off from your paper product, make sure to keep such elements at least 3 mm away from the edge of your finished product dimensions.Click here to know how to set up 3 mm safety margin.

        • 3. Use CMYK color mode

          Except for silkscreen and pad printing, files should be prepared in CMYK color mode. Keep in mind that if the setup is wrong, colors on the finished product may differ from the file you sent. Here is how to set your artwork to CMYK color mode in Adobe Illustrator.

        • 4. Use an image resolution of at least 300 DPI

          To avoid blurriness, use only images and graphics that have a resolution of 300 DPI or more. Before sending your files, make sure to embed your images into the file. Read more about how to check the resolution of your assets.

        • 5. Use the right values for gray elements

          When setting up grey elements, set K to a percentage between 0 and 100, and keep all other colors (C, M, and Y) equal to 0%.

        • 6. Use the right values for black elements

          When setting up black text, thin lines and small elements, use pure black, i.e. C = 0, M = 0, Y = 0, K = 100). Text, thin lines, and small elements in pure black color should be set to overprint to avoid white gaps around the text. For larger elements, use a composite form of black (we recommend C = 30, M = 0, Y = 0, K = 100).

        • 7. Use maximum 2 colors for lines that are finer than 2 pt

          If lines are 2 pt thick or less, use only 1 or 2 colors. 4 colors may be used for thicker lines.

        • 8. Convert all fonts to outlines, or embed them in your file

          To avoid issues with fonts when submitting your file(s), make sure to convert fonts to outlines, or to embed all fonts when saving to PDF.

        • 9. Save and upload your artwork files as PDF/X-1a

          The best format for submitting print-ready files is PDF, under the PDF/X-1a standard. Where possible, submit your files in PDF format. See why PDF/X-1a is the right format for printing.

        • 10. Check for overprint

          Make sure that no elements are set on overprint, unless you need them to be.

        Our free templates provide you with all the information you need to correctly prepare your artwork files for printing. Simply download the template that matches your desired product configuration.

        If you have any questions about the product and ordering process, please have a look at our Frequently Asked Questions (FAQ). If can't find your question in our FAQ section, you can reach our friendly customer support on 02-026-3147.

        • 1. What is the fastest delivery for n?

          The fastest delivery time for n is d. Please note that you have to submit your order before 01:00 PM. Late payment or upload of your artwork might further delay your order. If you select Digital Proof Print during the checkout process, the production will only begin after your approval.

        • 2. Which production techniques are used?

          We only use digital printing technique for this Business cards.

        • 3. How will my n be delivered?

          All of our products are delivered in a securely packed cardboard box.

        • 4. I can't find what I'm looking for. Can I request a quote?

          If you can't find what you need, please call our customer service team at 02-026-3147 to help you place an order. You can also request a quote from our customer service team for special product configurations that are not available on our website.

        • 5. How can I upload my files?

          If your artwork contains more than one page, you can either upload a single file which contains all pages, or upload separate files each containing one page. Your file(s) can be uploaded either before you checkout and pay, or after. Please note that uploading files late might result in a moved expected delivery date.

        • 6. Which formats can I upload?

          The best format for submitting print-ready files is PDF, under the PDF/X-1a standard. Learn how to save your artwork using PDF/X-1a standard in Adobe Illustrator. However you can also upload your file in JPEG, PNG, PSD, EPS, TIFF or AI format for an additional fee of THB 50.00. Our graphic designers will then convert your file into a print-ready PDF file.